
Key takeaways
- Warranty Description: 2 Year Manufacturer
- Tension Supported: 1000 pounds
- Handle Type: Fixed Handle
The moment that kills most home gym plans isn’t the price tag — it’s the tape measure. You pull it from the garage floor to the underside of the joists, get 88 inches, and realize that the 84-inch rack you’ve been eyeing leaves you four inches of headroom to press in. Or you’re in a second-bedroom setup where the rack has to live between a closet door and a radiator, and the “compact” cage you found online still wants a 60-by-60-inch pad of floor just to stand up straight. Tight-space lifting is a geometry problem before it’s a strength problem.
That’s why the CAP Barbell power rack family keeps showing up in cramped garages, basements with duct runs, and apartments where the lease says nothing about deadlifts. It isn’t the flashiest steel on the market, and nobody’s filming a commercial about it. What it does is fit — into low ceilings, into modest budgets, and into a plate-loaded progression that doesn’t require you to rebuild your whole training space every time you add a movement. Below is an honest look at where the line shines, where it strains, and how to pick the configuration that matches the box you’re actually training in.
Our top picks

 ULTRA FUEGO Power Cage
- Warranty Description: 2 Year Manufacturer
- Tension Supported: 1000 pounds
- Handle Type: Fixed Handle
 DP01 Power Cage
- Warranty Description: 2 year
- Tension Supported: 2000 pounds
- Grip Size: Standard


As an Amazon Associate we earn from qualifying purchases at no extra cost to you.
Quick Comparison
| Configuration | Approx. Footprint | Ceiling Needed | Best For | Trade-Off |
|---|---|---|---|---|
| Full power cage (4-post) | ~48″ x 46″ base | 7’4″ and up | Solo lifting with true safety bars, pull-up bar included | Largest floor claim; needs walk-in clearance on one side |
| Half rack / squat stand | ~48″ x 30″ base | 7’0″ and up | Garages where a car still has to park | Spotter arms replace full cage protection |
| Short squat stand pair | Two separate bases | Under 7’0″ possible | Low basements, storage between sessions | No pull-up bar, less lateral stability |
| Rack + dip/handle attachment | Adds ~10″ rear depth | Same as base rack | Adding pushing volume without new equipment | Blocks rear walkway when installed |
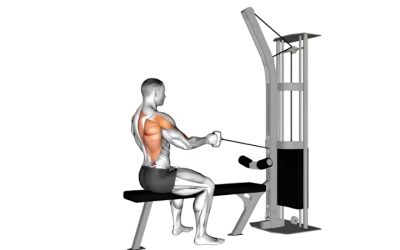
| Rack + lat/low-row attachment | Adds ~24″–30″ depth | Same as base rack | Pulling work in a no-machine room | Effectively doubles the rack’s depth |
How to Choose
- Measure the ceiling before the floor. Add roughly 10 inches to your standing height for an overhead press, then add the height of any platform or mat. If a garage door track crosses the space, measure to the track — not the drywall.
- Decide whether you need a cage or a catch. A four-post cage lets you bail a failed squat onto safety bars without a spotter. Spotter arms on a half rack do the same job with less steel, but they demand more precise bar placement and honest load selection.
- Check the hole spacing on the uprights. Tighter increments near bench-press height matter more than anything else. Two inches of adjustment error can turn a working set into a rep you can’t unrack.
- Match the numbers on the sticker to your actual ceiling of strength. Rated capacities on budget racks assume even, static loading. Leave real margin, avoid dropping loaded bars into the uprights, and bolt or sandbag the base if you plan to train near your limits.
- Plan the attachments you’ll add later, not just today. Depth is the sneaky dimension. A dip station or lat tower can push your usable footprint past a doorway swing, so sketch the finished layout before the first bolt goes in.
Top Picks Reviewed
CAP Barbell Power Racks and Attachments
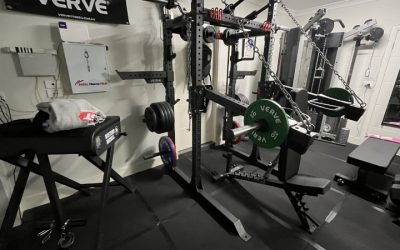
CAP’s racks earn their place in small rooms by being unfussy. The steel is powder-coated tubing with laser-cut adjustment holes, J-hooks that seat with a satisfying clack, and a base that stays flat on concrete without shimming. Assembly runs about an hour with a socket wrench and a second pair of hands for the top crossmembers; the instructions are terse but the hardware is bagged in order. Once it’s standing, the rack behaves the way a rack should — the uprights don’t flex under a heavy unrack, and the pull-up bar takes kipping without a shudder, provided you torqued the fasteners properly and re-check them after the first few weeks of use.
The line’s real advantage for tight spaces is that it’s modular rather than monolithic. Start with a squat stand configuration if you need the floor back after every session, then step up to a cage when your training outgrows spotter arms. Dip handles, landmine sleeves, plate storage pegs, and pulley attachments bolt into the same upright pattern, which means you can build a full-body station in one 4-by-4-foot corner over the course of a year instead of buying a machine you’d have to disassemble to move. Plate pegs deserve special mention here: hanging your 45s on the rack instead of stacking them on the floor is the single cheapest way to reclaim walking room in a garage.
Where it asks for compromise is at the extremes. If you routinely squat heavy triples above 400 pounds, or you plan to drop loaded bars from lockout, you’ll eventually want thicker gauge steel and a bolt-down footprint. The finish also scuffs where knurling meets the J-hook, which is cosmetic but noticeable. For the enormous middle range of home lifters — someone benching in the 100 to 300 pound band, squatting to depth, chasing pull-ups, and doing it in a room that also holds a water heater — this is a rack that solves the space problem without pretending to be commercial equipment.
Frequently Asked Questions
Do I have to bolt a power rack to the floor?
Not for most training. A four-post cage with plates loaded on the rear pegs is stable for squats, presses, and rows. Bolting becomes worthwhile if you’re doing heavy kipping pull-ups, banded work that pulls the frame forward, or lifting on a floating floor where the base can creep.
What ceiling height do I actually need?
For overhead pressing inside the rack, a 7-foot-4-inch ceiling handles most lifters up to about six feet tall. Below 7 feet, plan on pressing outside the rack or choosing a shorter squat stand and doing pull-ups from a doorway or wall-mount bar instead.
Will a standard bench fit inside a compact rack?
Usually, but check the inside width against your bench’s foot spread and the length of the bench against the front-to-back depth. In shallow cages you may need to angle the bench slightly or pull it partway out, which changes your press path — worth testing empty before you load the bar.
Are the attachments worth it, or should I buy separate equipment?
In a small room, attachments win almost every time. A bolt-on dip station occupies vertical space you already paid for, while a standalone dip tower claims new floor. The exception is anything with a long lever arm or deep pulley housing, which can add more depth than a compact standalone piece.
Final Thoughts
The best rack for a tight space is the one that leaves you enough room to actually lift — enough headroom for a press, enough floor to set your feet, enough clearance to walk past it in the dark without barking a shin. CAP Barbell’s power racks and attachments hit that target for a price that doesn’t require rationalizing, and their modular upright pattern means the setup can grow without a second purchase decision every time your programming changes. Measure twice, sketch the finished layout including attachments, then buy the configuration that fits the room you have rather than the gym you’re imagining. The steel is easy to add later; square footage isn’t.
Write Your Review
No reviews yet. Be the first to share your experience!