Key takeaways
- Compare window and border dimensions for a small print using paper mockups, simple arithmetic and a clear specification for your framer.
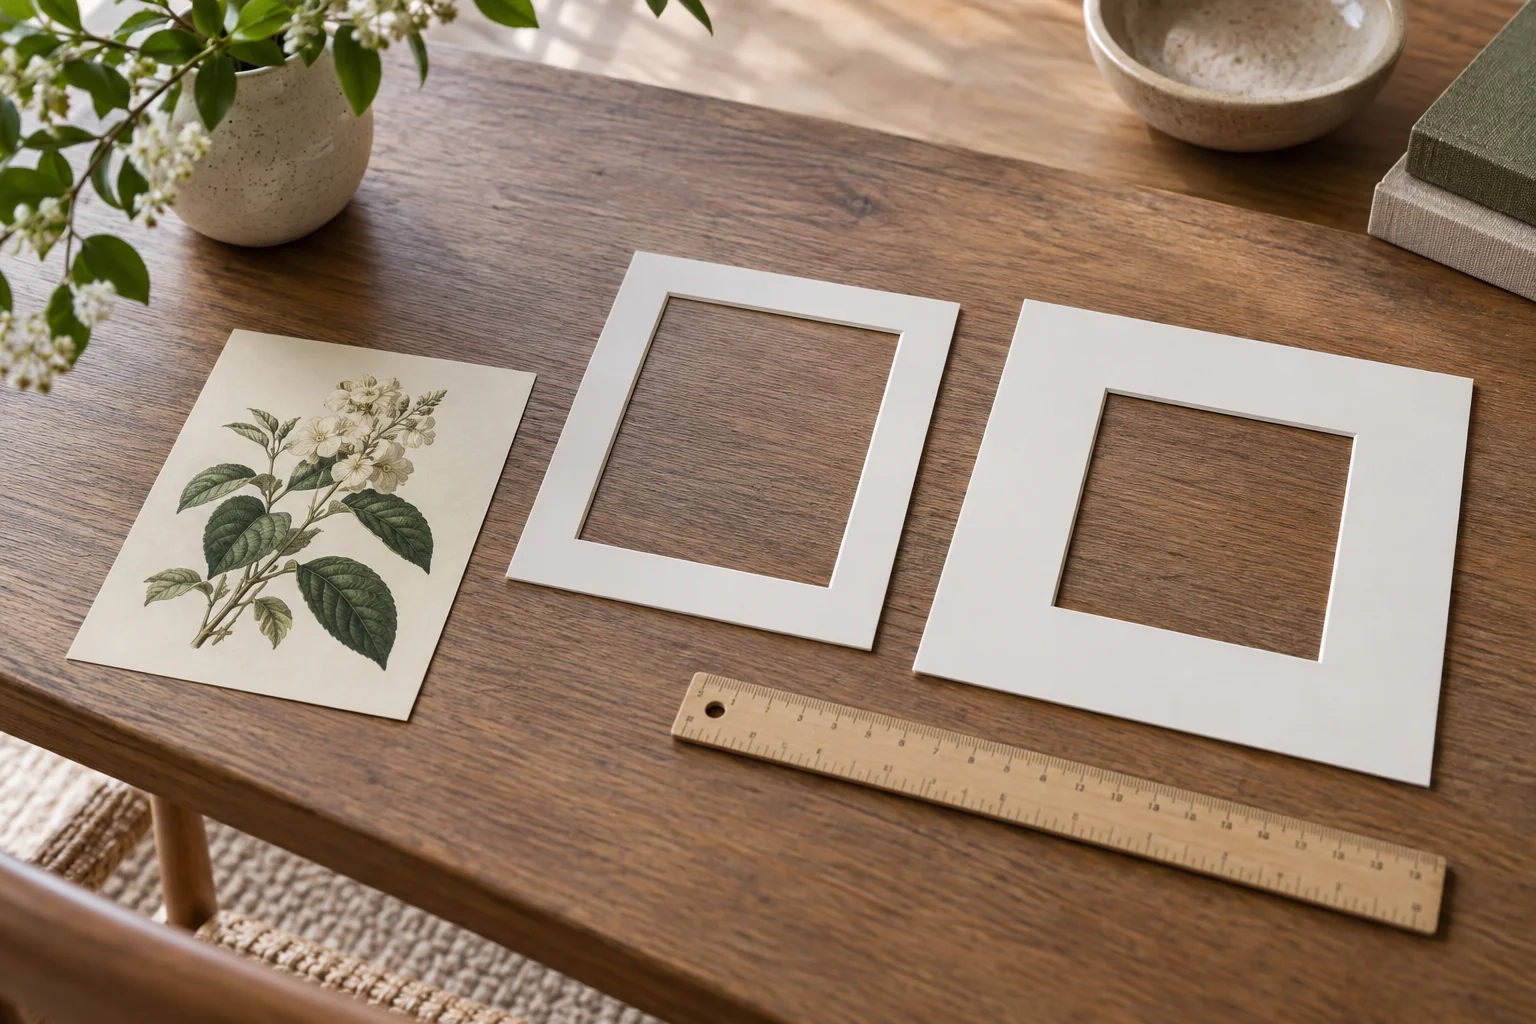
Choose a mat width for a small print by comparing the visible artwork window, the surrounding border and the frame opening together. Make paper mockups before ordering a cut mat. A wider border is a visual option, not a universal improvement, and the print’s physical support needs remain separate from the design choice.
This guide uses reproductions or copies for layout trials. For valuable, fragile or irreplaceable originals, ask a qualified framer or conservator about appropriate materials and mounting. Do not attach ordinary tape to an original just to hold a mockup in place.
Distinguish four measurements
Record the paper’s outside dimensions, the image area you want visible, the mat’s outside dimensions and the frame’s usable opening. They may all differ. A print can include a broad unprinted margin, a signature or a caption that should remain visible even though it lies outside the main image.
Draw the visible window you want on a copy or separate paper. Mark any detail that must not be hidden. Do not trim the original to make the frame work. A frame marketed for a particular picture size may describe the opening or supported insert, so confirm exactly what its specification means.
The Library of Congress framing guidance treats a mat as part of a preservation package, including suitable materials and separation between the artwork and glazing. It also recommends considering a reproduction instead of prolonged display of valuable paper originals. Border width alone does not establish conservation quality.
Calculate a starting border
For a centered rectangular window, subtract the window width from the mat’s outside width and divide by two to obtain the side borders. Do the same calculation with the heights for the top and bottom borders. Use consistent units and label the measurements clearly.
For example, an illustrative 5 by 7 inch window in an 8 by 10 inch mat has 1.5 inch borders on all four sides. A 5 by 7 window in an 11 by 14 mat has 3 inch side borders and 3.5 inch top and bottom borders. These are design calculations, not instructions to cut a particular original.
The final visible border can be affected by the frame lip covering part of the mat. Ask the framer to confirm the visible result and the actual cut dimensions. Also confirm how the artwork will be supported behind the window; do not assume an exact paper-sized opening is appropriate.
Compare two or three mockups
| Option | Visible window | Mat outside size | Calculated border | Observation to record |
|---|---|---|---|---|
| Compact example | 5 × 7 in | 8 × 10 in | 1.5 in each side | Does the frame crowd the image? |
| Wider example | 5 × 7 in | 11 × 14 in | 3 in sides; 3.5 in top/bottom | Does the small image still feel intentional? |
| Custom option | Your chosen window | Your proposed mat | Calculate separately | Are signature and caption visible? |
Cut mockups from ordinary paper away from the artwork, or make a simple digital rectangle at scale. Place the reproduction behind each window without adhesive touching it. Keep the print, viewing distance and lighting the same while comparing borders.
Judge the mat where the picture will be seen
Look at the mockups from the normal viewing position, not only at arm’s length on a table. A small print in a broad mat can work well as a quiet focal point, while the same arrangement may feel disconnected among tightly framed neighboring pictures. That is a composition judgment rather than a technical rule.
Compare the border color with the paper as well as the printed image. A bright white sample can make an off-white paper margin look more noticeable. Keep color and width trials separate initially so you know which change affected your preference.
If the picture belongs to a group, set the mockup beside the neighboring frames. Decide whether alignment of outer frames, image windows or overall visual weight matters most. You do not have to force all three to match, but recording the priority helps avoid an accidental-looking compromise.
Worked example: preserving a caption changes the plan
Imagine a small botanical reproduction with an image and a printed caption beneath it. The first proposed window shows only the image, producing neat equal borders in a ready-made frame. The owner then notices that the caption is part of what they enjoy about the print.
They redraw the visible window to include the caption and compare two larger mat sizes. The preferred mockup uses a slightly taller window, so the top and bottom borders differ from the first calculation. The owner sends the chosen window and outside dimensions to the framer for confirmation rather than ordering by “small print” alone.
This fictional example shows why the desired visible content comes first. A mathematically equal border is not a reason to hide meaningful details or cut the paper. The final mounting and frame depth are checked separately.
Write an order specification, not just a preference
Record the exact print identity, desired visible content, mat outside size, window orientation, border treatment and approved material choice. Include a photograph of the preferred mockup and ask the framer to confirm the finished visible dimensions.
Before accepting the result, check that the intended details remain visible and the object is supported appropriately without contacting the glazing. Keep placement away from unsuitable light or environmental conditions according to preservation advice. A successful mat gives the small print deliberate space while respecting what the object needs.