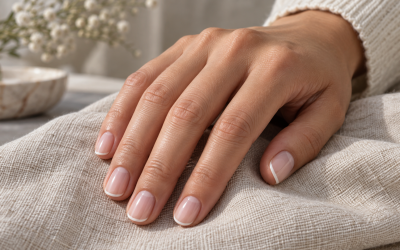
Featured image: AI-generated editorial illustration. It does not show a tested product or document a real-world example.
Key takeaways
- The safest high-contrast pairing is a blue-based true red with a cool baby pink. The temperature match means neither shade looks dirty, and the huge value gap between them means every placement technique reads clearly, even at a distance. This is the combination to pick…
Red and pink is the rare color pairing that works at almost every saturation level, which is exactly why it is so easy to get wrong. Put a true blue-red next to a warm coral pink and the two shades fight each other on the same hand. Put a cherry red next to a raspberry pink and they read as one slightly muddy color from arm’s length. The pairings that actually look designed share one thing: a deliberate decision about whether the two shades sit close together on the color wheel or far apart, and a deliberate decision about how much of each color appears on the hand.
What follows is a practical breakdown of how to build a red-and-pink manicure that holds up in daylight rather than only in a ring-light photo. It covers undertone matching, the ratio question that most tutorials skip entirely, six placement techniques ordered by how hard they are to execute at home, and the finish and formula choices that change how the same two bottles read on the nail. Everything here applies whether you are using regular lacquer that air dries or gel that has to cure under a UV/LED lamp, with notes on where the two systems behave differently.

Rose Flower Nail Stickers Decals 12 PCS Romantic Red Pink Rose Nail Art Stickers 3D Self-Adhesive Floral Blossom DIY Designs for Valentine's Day Manicure Decoration Nails Supplies Accessories
Selected for "red and pink nail design ideas": this listing is a general product (Rose Flower Nail Stickers Decals 12 PCS Romantic Red Pink Rose Nail Art Stickers), matching the product category this article compares.
View on Amazon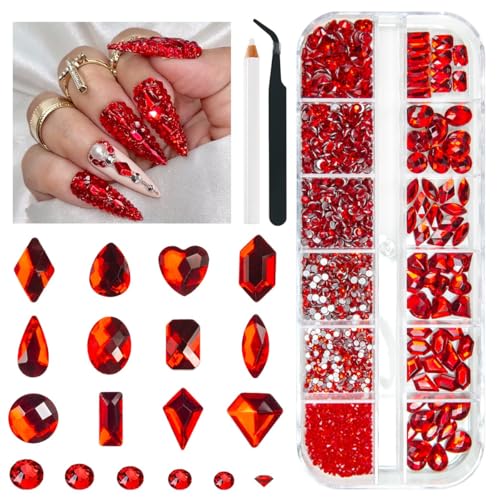
qiipii 2052Pcs Ruby Red Nail Art Rhinestones Crystal Flatback Round Gems
Selected for "red and pink nail design ideas": this listing is a general product (qiipii 2052Pcs Ruby Red Nail Art Rhinestones Crystal Flatback Round Gems), matching the product category this article compares.
View on Amazon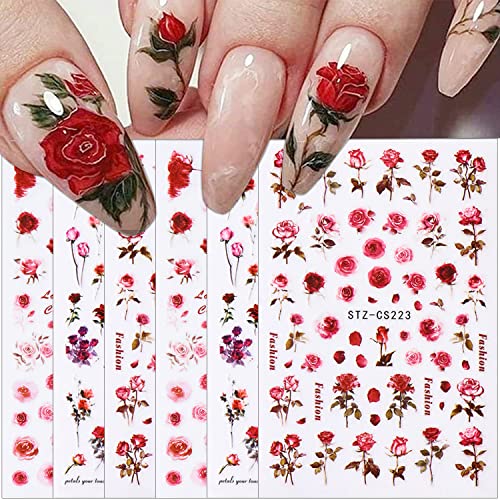
6 Sheets Flower Nail Art Stickers 3D Self-Adhesive Spring Rose Nail Decals Charming Pink Rose Floral Designs Nail Stickers for Acrylic Nail Art Red Rose Nail Art Decoration for Women Girls DIY
Selected for "red and pink nail design ideas": this listing is a general product (6 Sheets Flower Nail Art Stickers 3D Self-Adhesive Spring Rose Nail Decals Charm), matching the product category this article compares.
View on Amazon
SEMATA Flatback Nail Art Rhinestones Charms Beige Nail Pearls for Women
Selected for "red and pink nail design ideas": this listing is a general product (SEMATA Flatback Nail Art Rhinestones Charms Beige Nail Pearls for Women), matching the product category this article compares.
View on AmazonQuick Verdict
The safest high-contrast pairing is a blue-based true red with a cool baby pink. The temperature match means neither shade looks dirty, and the huge value gap between them means every placement technique reads clearly, even at a distance. This is the combination to pick if you are doing this yourself for the first time.
The most forgiving pairing for sloppy lines is tonal: a deep cherry or brick red with a dusty rose. The shades are close enough in depth that a wobbly edge between them barely registers. Tonal pairings are also the easiest to wear to an office or anywhere a full Valentine’s-red statement would feel out of place.
The pairing to be most careful with is warm orange-red plus cool bubblegum pink. It can look genuinely striking when the two colors are separated by negative space or a metallic line, but placed edge to edge they clash in a way that photographs worse than it looks in person.
| Pairing | Undertones | Contrast Level | Best Placement | Skill Needed |
|---|---|---|---|---|
| True red + baby pink | Both cool | High | Alternating nails, half-and-half | Beginner |
| Cherry red + dusty rose | Both cool-neutral | Low (tonal) | Gradient across five nails | Beginner |
| Brick red + terracotta pink | Both warm | Low (tonal) | Color block, French tip | Beginner |
| Coral red + peach pink | Both warm | Medium | Ombré fade, swirls | Intermediate |
| Burgundy + hot pink | Cool + cool-bright | Very high | Accent nail, tip only | Intermediate |
| Orange-red + bubblegum pink | Warm + cool (clash risk) | Very high | Separated by bare nail or gold line | Advanced |
| Sheer red jelly + sheer pink | Either, matched | Low | Layered, glazed look | Intermediate |
How to Do It
Match undertones before you match shades
Hold both bottles against a sheet of white paper in daylight, not under a lamp. A cool red leans toward blue or purple at its edges; a warm red leans orange. Do the same with the pink. If both lean the same direction, almost any placement will work. If they lean opposite directions, you need separation between them — bare nail, a thin metallic line, or simply putting them on non-adjacent fingers — or the two colors will make each other look cheap. This single check eliminates most of the manicures that look off without an obvious reason.
Decide the ratio, then the layout
The most common self-inflicted problem is a fifty-fifty split of red and pink across the hand, which reads as indecision. Aim for roughly 70/30 or 80/20. Pick one color as the base for most of the hand and let the second appear as an accent: two nails out of ten, a tip, a half-moon at the cuticle, or a small design element. If you want both colors to feel equally present, do it with a gradient instead — pink at the pinky moving to red at the thumb — so the eye reads a progression rather than a conflict.
Start with alternating nails before attempting anything freehand
Painting each nail a single solid color, alternating red and pink, requires no brush control beyond a normal manicure and still produces a clearly intentional look. Two thin coats beat one thick coat every time, in both lacquer and gel. With gel, each coat has to cure fully under the lamp before the next goes on; a thick coat may look hard on top while staying soft underneath, which is the usual cause of gel that dents or lifts within a day.
Half-and-half and color blocking
Split each nail vertically or diagonally into a red half and a pink half. The trick is not a steadier hand, it is striping tape or a thin liner brush plus patience: lay down the lighter color first across the whole nail, let it dry or cure, then paint the darker color over one section. Dark over light covers cleanly in one pass. Light over dark almost always needs two or three passes and ends up visibly thicker on that side.
Ombré and gradient fades
The makeup-sponge method still works best at home. Paint stripes of red and pink side by side on a cosmetic sponge, press the sponge onto the nail, repeat three or four times building the blend. With gel, cure after every sponge pass or the layers smear. Expect a slightly textured surface; a generous top coat smooths it out. If you want a smoother result with less effort, do a five-finger gradient instead — each nail a slightly different step between pink and red — which needs zero blending skill.
Swirls, hearts and micro-French
These are the techniques worth attempting once the basics are clean. A red French tip over a sheer pink base is the most wearable of the group and the easiest to fix, since a wobbly tip line can be corrected with a brush dipped in remover before curing or drying. Freehand swirls need a long striper brush and a base color that has fully set. Small hearts read better on one accent nail than repeated on all ten.
Finishes, Formulas and Making It Last
The same two colors behave like different manicures depending on finish. A glossy top coat pushes red and pink toward a classic, high-shine look and deepens both shades slightly. Matte does the opposite: it flattens the value difference between them, which makes tonal pairings look sophisticated and makes high-contrast pairings look softer and more graphic. A common compromise is matte over the whole nail with one glossy element — a heart, a tip, a swirl — left shiny, which gives dimension without a second color.
Sheer jelly formulas deserve a mention because they are the easiest route to a modern-looking red-and-pink manicure. Layering a sheer red over a sheer pink, or building three coats of a jelly red so it deepens from the tip inward, produces a candy-like depth you cannot get from an opaque formula. The tradeoff is that sheer formulas show every ridge and stain on the natural nail, so a ridge-filling base coat matters more here than usual.
Formula choice also determines what you are committing to. Regular lacquer air dries, chips sooner, and comes off with any remover in a few minutes, so it is the right pick for a look you might want to change in a few days. Gel polish does not air dry at all — it stays liquid until it cures under a UV or LED lamp — and typically holds two to three weeks without chipping. That durability is also its cost: gel has to be removed by filing off the shiny top layer and soaking in acetone for roughly ten to fifteen minutes, and it should never be peeled off. Peeling takes layers of the nail plate with it and leaves the surface thin and rough for weeks afterward.
Dip powder and acrylic are separate systems, not variations on gel. Dip powder cures by a resin activator rather than a lamp and generally requires a longer acetone soak. Acrylic is a hard enhancement that is usually filed down substantially before soaking. If you are switching between systems for a red-and-pink look, plan the removal for whichever system you are actually wearing rather than assuming one method covers all three.
For wear time in either system, the two details that matter most are capping the free edge — dragging the brush along the very tip of the nail with each coat — and keeping every product off the skin and cuticle. Color that touches skin creates a seal that breaks within a day and starts the lift that leads to chipping. If the sidewalls are hard to keep clean, leave a hairline of bare nail along each side deliberately; it looks like a design choice and dramatically improves longevity.
Related guides: best at home gel nail kits, french tip variations for 2026, nude pink nail ideas for short nails, backyard landscaping ideas on a budget, best beginner flowers for a cutting garden
FAQ
Which red and pink combination suits medium and deep skin tones best?
High-contrast pairings tend to read most clearly on deeper skin tones, so burgundy with hot pink, or true red with a bright cool pink, are strong choices. Very pale, milky pinks can look chalky against deeper skin; a dusty rose or a warm terracotta pink usually has more presence. On fair skin, warm coral reds and peach pinks tend to look softer than blue-based reds, which land more graphically. None of this is a rule, and testing a shade on one nail before committing is faster than any guideline.
Can I do a red-and-pink design without any nail art skill at all?
Yes. The alternating-nails approach and the five-finger gradient both require nothing beyond painting a solid color neatly. A red French tip using nail guide stickers is the next step up and still involves no freehand work. Skip swirls and hearts until solid color application is consistently clean at the cuticle and sidewalls.
Do I need a UV lamp for this look?
Only if you are using gel polish, which will not set without one. Regular polish air dries and needs no equipment. If you buy a color labeled gel, assume it requires a lamp unless the bottle explicitly says it is a soak-off-free, air-dry formula, which is a different product category entirely and behaves like lacquer.
Why does my pink look different over a red base than it does alone?
Most pinks are at least slightly translucent, so whatever sits underneath shifts the final color. Over red, a pink will pull warmer and darker. If you want a pink to look like the bottle, put it over a fully opaque white or nude layer, or use two to three coats of the pink directly over a clean base coat rather than over another color.
How do I keep a two-color manicure from looking dated?
The two things that date a red-and-pink manicure fastest are heavy embellishment and perfectly symmetrical designs on all ten nails. Keeping the design asymmetrical — one or two accent nails, not five — and letting the color pairing itself carry the look tends to age better than rhinestones and repeated motifs. Sheer and glazed finishes have also proven more durable stylistically than full-coverage glitter.