Key takeaways
- Run your hand around the installed unit on a warm day to feel for escaping cool air or incoming heat.
- Use a flashlight from the opposite side of the window to reveal small gaps before applying the final sealing layer.
- Keep curtains and shades several inches away from the AC intake and outlet so airflow is not trapped against fabric.
- Inspect foam and tape at the start of each cooling season; compressed, brittle, or peeling material should be replaced.
What's inside
A window air conditioner can cool a room effectively, but an imperfect seal can make the space feel drafty, noisy, and visually unfinished. Gaps around the unit allow warm air, dust, insects, and outdoor light to enter, forcing the appliance to work harder and disrupting the calm, layered atmosphere that good room design depends on. A well-sealed installation also helps prevent condensation from collecting where it can damage trim or nearby furniture.
This guide explains how to seal a window AC cleanly in 2026, from choosing the right materials to finishing the edges without blocking ventilation or creating a bulky appearance. You’ll learn how to assess the window, select foam or weather-sealing products, manage side panels, and keep the room comfortable after sunset when glare, drafts, and mechanical noise are especially noticeable.
As an Amazon Associate we earn from qualifying purchases.




Our Recommended Picks
Start With the Window and the AC Fit
Before buying sealant, inspect the window frame, sill, sash, and the accordion panels supplied with the unit. Measure the open portion of the window and note whether the surfaces are wood, painted metal, vinyl, or masonry. The seal must adhere to a clean, reasonably smooth surface; dusty or chalky paint will cause even strong adhesive to lift.
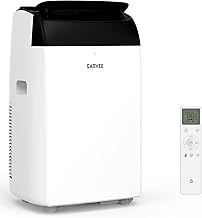
Confirm that the air conditioner is installed according to its manual, with the correct support and a slight outward tilt if the manufacturer specifies one. Sealing material is not a substitute for proper mounting. Keep the front grille, rear condenser, drainage points, and air intake clear. For a larger room, a model such as the BLACK+DECKER Window Air Conditioner 12,000 BTU BWAC12WTB may provide substantial cooling, but its performance still depends on a tight, stable installation.
Choose the Seal According to the Gap
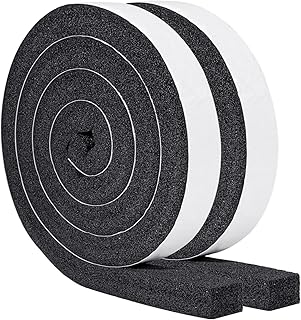
For narrow, uneven gaps around the top sash or frame, adhesive-backed foam is usually the most forgiving option. High Density Foam Tape Air Conditioner Window Seal comes in a thick 1-by-1-inch profile that can compress against irregular edges. Yotache Air Conditioner Window Seal Kit offers a similar 1-by-1-inch foam format in a longer 13-foot length, useful when you need to cover several sides or want extra material for a second window.
Use foam only where it can compress without pushing the unit out of position. If the gap is wider than the foam can bridge, first close it with a properly fitted panel or rigid insert. For exposed edges that need a broad, weather-resistant barrier, SWRT 20 Mil Window Weather Sealing Tape, 3 inches by 33 feet, can provide a wider finishing layer. Test a small section first, especially on delicate paint or finished wood.
Seal the Side Panels and Sash
The side panels are often the weakest visual and thermal points of a window AC installation. Extend each panel fully, fasten it securely, and inspect the pleats for openings. A dedicated kit such as the 2 Pack Window Air Conditioner Side Panels can help cover open areas around the unit; its listed 17-by-9-inch panels are best treated as replacement or supplementary pieces, so compare those dimensions with your window before ordering.
Next, press foam tape along the meeting line between the upper and lower sash. Apply it in one continuous run where possible, keeping the strip straight and free of folds. Close the sash gently onto the foam rather than compressing it aggressively. A seal that is too thick can bow the window, while one that is too thin may leave a visible light gap. In a thoughtfully lit room, even a slim opening can create a sharp stripe of daylight or streetlight after dark.
Prepare, Apply, and Finish Cleanly
Remove old adhesive and loose debris, then wipe the bonding surface with a mild cleaner. Allow it to dry completely. Cut each strip with a little extra length, position it without stretching, and press firmly along the full run. Give the adhesive time to grab before repeatedly opening or adjusting the window.
For a neater finish, place seams at corners rather than in the middle of a visible span. Do not cover drainage openings or wrap tape over controls, removable filters, or moving portions of the unit. If you need a removable seasonal solution, choose products designed for clean removal and keep the original surfaces in mind. Strong tape may seal well but can pull paint or leave residue when the AC is taken out.
Portable AC Windows Need a Different Approach
A portable air conditioner vents through a hose, so its window seal must surround the exhaust opening rather than simply close the sash around a box. The HOOMEE 197-inch Universal Window Seal is designed for portable AC and tumble-dryer hose arrangements, using a zip-and-fastener format that can be removed more easily than a permanent panel. Follow the kit’s layout carefully so the zipper opening sits around the hose without twisting.
With any portable setup, check that the hose is as short and straight as practical and that the window fabric or seal is taut. Do not pinch the exhaust hose, and leave enough clearance for the window to close securely. Because the seal is visible, select a color and finish that recede into the window treatment rather than competing with lamps, artwork, or ambient lighting.
Tips
- Run your hand around the installed unit on a warm day to feel for escaping cool air or incoming heat.
- Use a flashlight from the opposite side of the window to reveal small gaps before applying the final sealing layer.
- Keep curtains and shades several inches away from the AC intake and outlet so airflow is not trapped against fabric.
- Inspect foam and tape at the start of each cooling season; compressed, brittle, or peeling material should be replaced.
Frequently Asked Questions
What is the best material for sealing a window AC?
Compressible adhesive-backed foam is a practical choice for small, uneven gaps around the sash and frame. Wider weather-sealing tape can finish larger exposed edges, while rigid or dedicated side panels are better for open spaces that foam cannot safely bridge.
Can I use regular duct tape around a window air conditioner?
It may provide a temporary seal, but ordinary duct tape can become brittle, leave adhesive behind, or pull off paint. A purpose-made foam seal or weather-sealing tape is generally easier to position and more suitable for seasonal removal.
How often should window AC seals be replaced?
Check them every season and replace them when they flatten permanently, crack, detach, or no longer block visible light and drafts. High sun exposure, moisture, and frequent window movement can shorten their useful life.
Should I seal the outside of the air conditioner too?
Seal the interior gaps around the window and unit, but do not obstruct the rear grille, condenser coil, drainage path, or service access. Exterior modifications should follow the air conditioner’s installation instructions and local building requirements.
Conclusion
The best window AC seal is not simply the thickest tape or the most permanent barrier. It is a measured combination of stable installation, correctly sized side coverage, compressible foam, and clean finishing. Products such as the Yotache foam kit, High Density Foam Tape, SWRT weather-sealing tape, and HOOMEE portable-window seal can address different installation styles. Take time to prepare the surfaces and protect airflow, and the result will be cooler, quieter, and more visually composed.