Our Top Picks
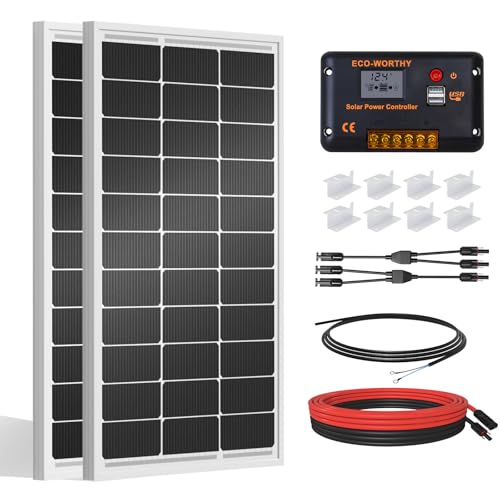 ECO-WORTHY 200 Watts 12 Volt/24 Volt Solar Panel200W - KIT39.37 x 22.44 x 3.7 inches31.6 poundsCheck on Amazon
 ECO-WORTHY 1.6KWH Complete Solar Panel Kit 400W 12V400W 12V MPPT Complete Kit Pro35.63 x 23.03 x 1.18 InchesCheck on Amazon
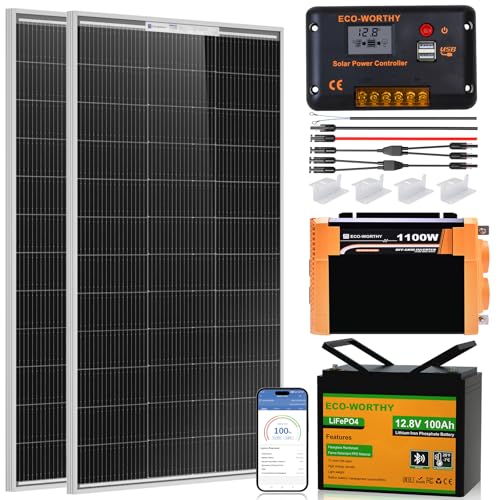 ECO-WORTHY 200 Watt 12V Complete Solar Panel StarterUltra 200W Complete Kit35.63 x 23.03 x 1.18 inches11.5 poundsCheck on Amazon
 ECO-WORTHY 7.168KWH 800W Solar Panel Kit for RV800W PCS COMPLETE SYSTEM58.86 x 26.18 x 1.18 inchesCheck on Amazon
Best Van Solar Panel Kits for Off-Grid Living: The Short Answer
The best van solar panel kit for off-grid living is a 400–600 W array of rigid monocrystalline panels paired with 300–600 Ah of LiFePO4 battery capacity and an MPPT charge controller rated at 1.25× or more of the array’s short-circuit current — that combination runs a 12 V compressor fridge, a roof fan, LED lighting, laptop and phone charging, and a diesel heater’s fan draw through four seasons across most of the continental United States. If you cook on induction, run a 12 V air conditioner, or work full days on Starlink, move up to 800–1,200 W of panels and 600–800 Ah of storage. Below 200 W you have a battery maintainer, not an off-grid power system.
Everything below explains how to arrive at that number for your specific van, your specific appliances, and your specific roof — and then compares the kit families that actually fit those constraints, including roof-space math, controller selection, mounting hardware, and the failure points that show up two and three years into full-time living.
ECO-WORTHY 200 Watts 12 Volt/24 Volt Solar Panel Kit with High Efficiency Monocrystalline Solar Panel and 30A PWM Charge Controller for RV, Camper, Vehicle, Caravan and Other Off Grid Applications
Chosen because it specifies Camper and Vehicle.
View on AmazonECO-WORTHY 1.6KWH Complete Solar Panel Kit 400W 12V for RV Off Grid
Picked as a relevant option in this category.
View on AmazonECO-WORTHY 200 Watt 12V Complete Solar Panel Starter Kit for RV Off Grid
Picked as a relevant option in this category.
View on AmazonECO-WORTHY 7.168KWH 800W Solar Panel Kit for RV Off Grid Complete System
Picked as a relevant option in this category.
View on AmazonStart With the Load, Not the Panel
The single most common mistake in van solar builds is buying panels first and discovering the load second. Panels are the cheapest part of the system per dollar of capability, and they are also the hardest to change later, because roof real estate is fixed and every hole you drill is permanent. So the ordering is always: audit the load, size the battery, size the array, then choose the controller and wiring to match.
Do the audit in watt-hours per day, not watts. A 45 W compressor fridge does not draw 45 W for 24 hours; it cycles on roughly 40–60% of the time in mild weather and 70–80% in a hot van, which puts it at 400–900 Wh per day depending on ambient temperature and how often the door opens. That single variable — fridge duty cycle — is why two identical vans can need 300 W and 800 W of solar respectively.
Daily energy audit for a typical full-time van
| Appliance | Running watts | Hours/day | Wh/day | Notes |
|---|---|---|---|---|
| 12 V compressor fridge (45–65 L) | 45 | 8–14 effective | 360–630 | Duty cycle rises with ambient temp |
| Roof vent fan (MaxxAir-class) | 30 | 6 | 180 | Lower on low speed |
| LED lighting (6 fixtures) | 10 | 5 | 50 | — |
| Laptop charging | 60 | 4 | 240 | Higher with a dock |
| Starlink or cellular router | 50 | 8 | 400 | Dishy draws 40–75 W typical |
| Phone/tablet/camera charging | 30 | 4 | 120 | — |
| Diesel heater fan + pump | 30 | 8 | 240 | Fuel consumption separate |
| Water pump | 60 | 0.3 | 18 | — |
| Inverter idle draw | 10 | 24 | 240 | Often overlooked |
| Induction cooktop (via inverter) | 1,200 | 0.5 | 600 | Biggest single swing item |
| Electric kettle (via inverter) | 1,000 | 0.2 | 200 | — |
A minimal build with a fridge, fan, lights, and phone charging lands near 900–1,200 Wh/day. A work-from-van build with Starlink and a laptop lands at 1,600–2,200 Wh/day. Add induction cooking and you are at 2,400–3,200 Wh/day. Add a 12 V air conditioner running four hours and you can exceed 5,000 Wh/day, which is a fundamentally different system class.
Matching Array Wattage to Battery Capacity
Solar harvest is not nameplate wattage. A flat-mounted panel in North America produces roughly 65–75% of its rated wattage in usable charge over a full day, after accounting for charge controller losses, heat derating, and non-optimal tilt. The working formula is array watts × peak sun hours × 0.70.
Peak sun hours vary enormously by latitude and season. In southern Arizona you get 6.0–6.5 in summer and 4.5–5.0 in winter. In the Pacific Northwest or New England you get 5.0–5.5 in summer and 2.0–2.5 in December and January. That winter number is the one that breaks van builds, because it is the same season when the diesel heater fan is running eight hours a night.
Array size, realistic harvest, and the battery bank it supports
| Array (W) | Harvest @ 2.5 PSH (Wh) | Harvest @ 4.5 PSH (Wh) | Harvest @ 6.0 PSH (Wh) | LiFePO4 bank (Ah @ 12.8 V) | Lead-acid bank (Ah @ 12 V) |
|---|---|---|---|---|---|
| 100 | 175 | 315 | 420 | 50–100 | 100–150 |
| 200 | 350 | 630 | 840 | 100–150 | 150–200 |
| 300 | 525 | 945 | 1,260 | 150–200 | 200–300 |
| 400 | 700 | 1,260 | 1,680 | 200–300 | 300–400 |
| 600 | 1,050 | 1,890 | 2,520 | 300–400 | 450–600 |
| 800 | 1,400 | 2,520 | 3,360 | 400–600 | 600–800 |
| 1,000 | 1,750 | 3,150 | 4,200 | 600–800 | 800–1,000 |
| 1,200 | 2,100 | 3,780 | 5,040 | 700–900 | 900–1,200 |
Two ratios matter beyond raw harvest. The first is charge rate: LiFePO4 cells accept charge at 0.2C to 0.5C, meaning a 300 Ah bank can absorb 60–150 A. A 600 W array through an MPPT controller at 12 V produces roughly 45–50 A at peak, which is a comfortable 0.15C and leaves headroom. Lead-acid is the opposite problem — it accepts only about 0.1C to 0.2C above 80% state of charge, so a 400 Ah flooded bank will only take 40–80 A, and oversized arrays simply stop being useful past mid-day.
The second is days of autonomy. Most van dwellers plan for two days without meaningful sun. A 400 W array with a 300 Ah LiFePO4 bank gives you 3,840 Wh nominal, about 3,450 Wh usable at 90% depth of discharge, and 1,400 Wh of winter harvest in a bad-sun region — roughly one day of autonomy on a work-from-van load. That is why the 400–600 W recommendation assumes you also have a DC-DC charger tied to the alternator as a second charging source.
Roof Space: The Measurement That Kills Builds
Roof area is where most plans collapse. A 400 W kit that arrives as one large panel may simply not fit between a roof fan and a vent, and rigid panels cannot be trimmed. Measure usable roof length and width between ribs, subtract obstructions, and only then pick panel dimensions.
Typical usable roof dimensions by van
| Van | Usable roof length | Usable width between rails | Practical max rigid array | Main obstruction risk |
|---|---|---|---|---|
| Ford Transit Connect / small MPV | 6 ft 6 in – 8 ft | 4 ft 6 in | 200–300 W | Curved roof, no flat span |
| Mercedes Metris / Nissan NV200 | 8 ft | 4 ft 8 in | 200–400 W | Short flat section |
| Ford Transit 130″ WB | 10 ft | 5 ft 6 in | 400–500 W | Roof fan cutout |
| Ram ProMaster 136″ WB | 11 ft | 5 ft 8 in | 400–600 W | Ribbed roof, wide flat center |
| Mercedes Sprinter 144″ WB | 11 ft 4 in | 5 ft 6 in | 400–600 W | Roof fan + vent stack |
| Ford Transit 148″ WB | 12 ft 6 in | 5 ft 6 in | 600–800 W | Roof fan + AC |
| Ram ProMaster 159″ WB | 13 ft 6 in | 5 ft 8 in | 600–800 W | AC footprint |
| Mercedes Sprinter 170″ WB | 14 ft | 5 ft 6 in | 800–1,000 W | AC + fan + vents |
| Transit 148″ Extended / ProMaster 159″ Ext | 14 ft 6 in – 15 ft 6 in | 5 ft 6 in – 5 ft 8 in | 1,000–1,200 W | Rear roof slope |
Obstruction footprints you have to subtract: a roof vent fan needs a 14 × 14 in cutout and roughly 4 in of clear space behind it so the lid can open fully. A rooftop air conditioner occupies about 30 × 40 in and adds 70–100 lb. A cellular antenna is small but casts a hard shadow. A roof rack crossbar set consumes 3–4 in of height and creates shading stripes across any panel mounted underneath it.
Panel dimensions and weight by wattage class
| Panel class | Typical dimensions | Weight | Isc | Roof notes |
|---|---|---|---|---|
| 100 W rigid mono | 40 × 26.5 × 1.4 in | 15–18 lb | 5.5–6.0 A | Fits almost any van |
| 100 W flexible | 41 × 21 × 0.1 in | 4–5 lb | 5.5 A | Can follow curved roofs |
| 175–200 W rigid | 58 × 27 × 1.4 in | 26–30 lb | 10.5–11.5 A | Two side by side = 54 in width |
| 200 W flexible | 59 × 27 × 0.1 in | 8–10 lb | 11.0 A | VHB or adhesive mount |
| 300 W rigid | 65 × 39 × 1.4 in | 38–44 lb | 16.5 A | Often too wide for one rail span |
| 400 W single rigid | 67–78 × 39–40 × 1.4 in | 45–52 lb | 20–22 A | Best on 170″ Sprinter |
| 2 × 200 W pair | 58 × 54 in combined | 52–60 lb | 22 A total | Easier to handle and ship |
Leave 1–2 in between adjacent panels and 2–3 in from roof edges, fans, and rack feet. That gap is not cosmetic: panels mounted dead-flush against a roof run 8–12 °C hotter, and every 1 °C above 25 °C costs roughly 0.35% of power. A panel at 65 °C loses about 14% of its rated output compared to its 25 °C rating, so airflow is worth real watt-hours. Give MC4 connectors about 6 in of slack so the cables are not under tension at the joint.
Controller Type: PWM, MPPT, and Why It Decides Your Array Size
The charge controller is the component that most often gets undersized, and it is the one that silently caps your harvest. PWM controllers clamp panel voltage down to battery voltage, wasting the difference — typically 25–30% of what an MPPT controller would deliver. MPPT controllers convert the extra voltage into additional current.
Controller comparison
| Type | Typical efficiency | Best array size | Voltage handling | Price range | When it makes sense |
|---|---|---|---|---|---|
| PWM, 10–30 A | 65–75% of MPPT | 100–200 W | 12/24 V nominal only | $30–$90 | Budget starter kit, tiny loads |
| MPPT, 10–20 A | 95–98% | 150–300 W | Up to 100 V PV input | $120–$220 | Any full-time build |
| MPPT, 30–50 A | 96–98% | 400–700 W | Up to 100–150 V | $200–$450 | The mainstream sweet spot |
| MPPT, 70–100 A | 96–98% | 800–1,400 W | Up to 150–250 V | $450–$900 | Large arrays, series strings |
| DC-DC + solar input | 90–95% | 200–600 W plus alternator | Up to 50 V PV | $250–$550 | Adding alternator charging in one box |
Size the controller by short-circuit current, not wattage. A 600 W array at 12 V produces roughly 50 A, and its Isc across three 200 W panels is about 33 A. A controller rated for 50 A of output handles it with headroom. The rule of thumb: controller output amps ≥ array watts ÷ 12 V × 1.25.
Series versus parallel wiring is the other decision. Series strings raise voltage, which lets you use thinner cable and reach the controller with less loss, but a single shaded panel drags the whole string down unless the panels have bypass diodes. Parallel wiring keeps panels independent under partial shade but pushes current up, requiring heavier cable. On a van roof with a fan, an AC unit, and an antenna casting shadows, parallel or a two-panel series pairing is usually the more forgiving layout.
Mounting Hardware and Roof Penetration
There are three mounting methods, and each has a distinct durability profile.
- Z-brackets with mechanical fasteners: four brackets per panel, each screwed into the roof with a well nut or rivnut, then sealed with a polyurethane or self-leveling lap sealant. This is the most secure option and the only one that reliably survives 70 mph highway crosswinds. It requires drilling 16 holes for a four-panel array.
- VHB tape with lap sealant over the edges: no drilling, used mainly for flexible panels and lightweight rigid panels. Adhesion is strong initially — often over 100 lb of pull strength per square inch in shear — but degrades with sustained heat above 90 °F roof surface temperature. Expect re-taping on a 5–10 year cycle.
- Roof rack or extruded rail: panels bolt to crossbars or side rails. Reversible, easy to tilt, and adds 3–5 in of height. The downside is shading from the rack itself and a higher center of gravity.
Every roof penetration needs two layers of defense: a mechanical seal (butyl tape or a gasketed gland) and a chemical seal (lap sealant). Reapply lap sealant every 3–5 years; it cracks and pulls away from the panel frame as it ages, and that is where water gets in.
Weather and Durability: What the Ratings Actually Mean
| Rating or spec | What it means | Typical value |
|---|---|---|
| IEC 61215 / 61730 | Design qualification and safety certification | Present on quality panels |
| Hail impact | Ice ball diameter at velocity | 25 mm at 23 m/s (~51 mph) |
| Snow load | Static pressure the frame and glass tolerate | 5,400 Pa (~113 psf) |
| Wind load | Front and rear surface pressure | 2,400 Pa (~50 psf) |
| Junction box | Water and dust ingress protection | IP65 to IP68 |
| Connector | MC4-style, UV-stabilized | IP67 when mated |
| Power temperature coefficient | Output loss per °C above 25 °C | −0.30% to −0.40%/°C |
| Glass | Tempered, low-iron | 3.2 mm typical |
| Frame | Anodized aluminum alloy | 30–35 mm profile |
The durability question that matters most for a van is not hail — it is sustained vibration, thermal cycling, and salt. Highway vibration works on every fastener and every crimp. Thermal cycling from a 20 °F night to a 150 °F roof surface expands and contracts the aluminum frame against the glass, and over years that stress shows up as microcracks in the cell interconnects. Coastal and winter-road exposure adds chloride, which attacks unsealed aluminum and cheap connectors first.
For flexible panels specifically, the failure mode is different. Cells laminated without a rigid backing flex with the roof, and repeated flexing at the same point cracks cells. Flexible panels mounted on a flat, supported surface and never walked on can last 5–8 years; flexible panels mounted over a curved, unsupported span and flexed by wind can fail in 2–3. If you choose flexible, bond them to a flat substrate, not directly over a curve.
Installation Complexity Tiers
Roughly, van solar installs fall into four tiers, and knowing which tier you are in tells you the tool list, the time, and the failure points.
- Tier 1 — portable suitcase kit. No roof penetration. Panel folds out, cable runs through a door or window gasket to a controller clipped near the battery. Two to three hours, basic hand tools, no drilling. Output is limited by where you can park, and the panel must be stowed while driving.
- Tier 2 — single rigid panel with Z-brackets. One to two panels, a gland fitting, a controller mounted near the battery, fused positive cable. Half a day, drill, sealant, crimper, 10–14 AWG cable.
- Tier 3 — multi-panel array with combiner and lithium bank. Three to six panels, roof entry box, branch connectors or a combiner box, 6–8 AWG main run, 30–50 A MPPT, LiFePO4 bank, shunt-based battery monitor. One to two days.
- Tier 4 — full off-grid electrical system. Adds a DC-DC charger, inverter with transfer switch, shore power inlet, AC and DC distribution panels, and a battery management display. Three to five days, and this is where professional installation is worth the $1,200–$3,500 labor range.
Cable sizing for a 12 V van system
| Circuit | Current | Run length | Minimum AWG | Fuse |
|---|---|---|---|---|
| Single 100 W panel to controller | 6 A | 15 ft | 14 AWG | 10 A |
| Two 200 W panels parallel to controller | 22 A | 20 ft | 10 AWG | 30 A |
| Four-panel array to controller | 44 A | 20 ft | 6 AWG | 60 A |
| Controller to battery (50 A MPPT) | 50 A | 6 ft | 6 AWG | 60 A |
| Battery to 2,000 W inverter | 200 A peak | 4 ft | 2/0 AWG | 250 A |
| DC-DC charger to battery | 50 A | 8 ft | 6 AWG | 60 A |
| Battery to fuse block | 100 A | 5 ft | 4 AWG | 100 A |
Fuse the array at 1.56× Isc rounded up to the next standard size, fuse the controller output at its rated amps, and fuse the inverter at 1.25× its continuous draw. Every positive conductor that leaves the battery should be fused within 7 in of the terminal.
Rigid Panel Kit Families
100–200 W starter kits with PWM controllers
These kits typically bundle one or two 100 W monocrystalline panels, a 20–30 A PWM controller, Z-brackets, and 10–20 ft of cable. Market range is usually $150–$350. Brands in this space include Renogy, HQST, Newpowa, WindyNation, and ACOPOWER, and the kits are broadly similar in construction: 3.2 mm tempered glass, anodized frames, IP65 junction boxes, and 12 AWG pigtails with MC4 connectors.
Where they differ is the controller. A PWM controller in a $180 kit will waste a quarter of what the panel produces. If you buy a starter kit, budget an extra $120–$220 to replace the PWM unit with a 20 A MPPT controller — that single swap often delivers more additional daily watt-hours than adding a third panel would. Use this class for weekend vans, battery maintenance, or a first build on a Transit Connect where roof space is 6–8 ft long.
200–400 W MPPT kits
This is the volume segment and the most common full-time starting point. A typical 400 W kit ships as two 200 W panels or four 100 W panels, a 30–40 A MPPT controller, mounting brackets, and tray cable. Market range is usually $500–$950. Renogy, Rich Solar, Go Power!, Zamp, and ACOPOWER all offer kits in this class, and several include a Bluetooth-enabled controller with a phone app for monitoring.
Two panels of 200 W side by side occupy about 58 × 54 in, which fits neatly on a 148″ Transit or 159″ ProMaster roof alongside a fan. Four 100 W panels give you more layout flexibility around obstructions at the cost of more mounting hardware and more connections to seal. Both produce roughly 1,260 Wh/day at 4.5 peak sun hours, which covers a fridge, fan, lights, and laptop but not Starlink plus induction cooking.
600–800 W expandable kits
At this size, kits usually ship as three or four 200 W panels with a 50–60 A MPPT controller and a combiner or branch connector set. Market range is usually $800–$1,500. This is the class where a 300–400 Ah LiFePO4 bank, a 50 A DC-DC charger, and a 2,000 W inverter start to make sense as a complete system.
Wiring changes at this scale. Three panels in parallel produce roughly 33 A at 12 V, which requires 6–8 AWG for a 20 ft run to keep voltage drop under 3%. Many builders switch to a series-parallel configuration at this point — two strings of two panels — which halves the current and lets them run 10 AWG, at the cost of some shade tolerance.
1,000–1,200 W large-array kits
Reserved for 170″ Sprinters, extended Transits, and ProMasters, or for vans that carry a 12 V air conditioner. Market range is usually $1,200–$2,400 for panels and controller alone. Four to six 200 W panels, or two 400 W panels, plus a 70–100 A MPPT controller. Roof space becomes the binding constraint, and the roof fan, AC, and antenna layout has to be designed before the panels are ordered.
Portable and Suitcase Kits
Portable kits solve three problems: no drilling, no permanent roof weight, and the ability to park in shade while placing the panel in sun. They solve them at the cost of output, security, and stowage volume.
Folding suitcase kits (100–200 W)
A 100 W suitcase typically measures about 27 × 21 × 2.5 in folded and weighs 20–28 lb, opening to roughly 40 × 27 in with an integrated kickstand and a built-in 10–20 A controller. Market range is usually $200–$450. Renogy, Go Power!, Zamp, and ACOPOWER all offer versions in this class, usually with a carry handle and a 10–15 ft cable terminated in alligator clips or an SAE connector.
The practical limits are real: a 100 W suitcase produces about 315 Wh/day at 4.5 peak sun hours, which is under half of what a fridge needs. It is a supplement or a weekend tool, not a primary source. Also plan for theft — an unattended portable panel on the ground is the single most stolen item in a van build, so a locking cable or a chain through the frame is standard practice.
Portable panels paired with power stations
The other portable route is a folding panel designed for a specific power station’s input. EcoFlow, Jackery, BLUETTI, and Goal Zero all sell panels in the 100–400 W range with proprietary or standard XT60/Anderson-compatible connectors and MPPT tracking built into the station. Market range is usually $250–$900 for a 200–400 W panel.
These are the simplest possible van setups: no roof work, no separate controller, no battery bank wiring, because the power station contains the battery, the MPPT, and the inverter. A 400 W folding panel with a 2 kWh station is a genuine off-grid system for a light load profile. The trade-offs are capacity ceiling, charge rate limits (many stations cap solar input at 400–800 W regardless of how much panel you attach), and the fact that a power station’s battery is not user-serviceable.
Flexible and semi-flexible panels
Flexible panels run 4–10 lb for a 100–200 W unit versus 15–30 lb for rigid, and they can follow a slightly curved roof. Market range is usually $150–$500 per panel. Manufacturers in this category include Renogy, Lensun, Solbian, Sunflare, and Merlin Solar, with cell technologies ranging from conventional monocrystalline to thin-film CIGS.
The honest trade-off table is short. Flexible panels cost 1.5–2.5× more per watt, produce 5–15% less power per square foot, run hotter because they lack a glass heat sink and rear airflow, and have a shorter service life under vibration. They earn their place on curved roofs, on weight-limited builds, and where you want a walkable surface. They do not earn their place purely on price or efficiency.
High-Efficiency and Premium Cell Kits
Panel efficiency ranges from about 17% for commodity monocrystalline to 22–24% for back-contact and shingled-cell designs. On a van, efficiency matters less for total output than for area: a 24% panel produces the same wattage in roughly 25% less roof area than a 17% panel, which is exactly what you need when the roof fan and AC have eaten your real estate.
| Cell technology | Module efficiency | Watts per sq ft | Price per watt (kit) | Best use on a van |
|---|---|---|---|---|
| Commodity monocrystalline PERC | 17–20% | ~15 W | $0.80–$1.50 | Large roofs, budget builds |
| Half-cut monocrystalline | 19–21% | ~16.5 W | $1.00–$1.80 | Better shade tolerance |
| Shingled-cell | 20–22% | ~17.5 W | $1.30–$2.20 | Compact arrays |
| Back-contact (Maxeon-class) | 22–24% | ~19 W | $1.80–$3.00 | Short roofs, high-value space |
| Flexible thin-film CIGS | 14–17% | ~12 W | $1.50–$2.80 | Curved roofs, weight limits |
Back-contact panels from Maxeon-class manufacturers and shingled-cell designs from several premium brands are the ones worth the premium when you are trying to squeeze 400 W onto a 10 ft roof section. On a 170″ Sprinter with 14 ft of usable length, the premium is harder to justify — you have the area, so buy commodity panels and spend the difference on battery capacity.
Alternator Charging and Hybrid Kits
Solar alone is unreliable in winter and at high latitude, and every serious off-grid van build pairs it with alternator charging. A DC-DC charger with a solar input handles both sources in one box, which is the cleanest architecture and the one most builders now choose.
A 30 A DC-DC unit is adequate for a 200–300 Ah bank; a 50 A unit suits 300–600 Ah. Market range is usually $250–$550 for a 30–50 A unit with integrated MPPT. REDARC, Sterling Power, Victron, Renogy, and Kisae all make units in this class. Charging from the alternator typically delivers 400–700 Wh per hour of driving, which means two hours of driving can replace an entire winter day of solar.
Two cautions. First, the charger must be ignition-triggered or voltage-sensed so it does not drain the starter battery when the engine is off. Second, a 50 A charger pulls roughly 700 W from the alternator — check your alternator rating, because a 180 A stock alternator on a Transit or Sprinter is fine, but a 110 A unit running a 50 A charger, headlights, and a blower motor is close to its limit.
Battery Bank Choices and What They Do to Kit Sizing
| Chemistry | Usable depth of discharge | Cycle life | Weight per 100 Ah | Price per 100 Ah | Solar sizing effect |
|---|---|---|---|---|---|
| Flooded lead-acid | 50% | 300–500 | 60–70 lb | $150–$300 | Needs 1.5× array for same usable Wh |
| AGM | 50–60% | 400–700 | 65–75 lb | $200–$400 | Same as flooded, no maintenance |
| Gel | 50–60% | 500–1,000 | 65–75 lb | $280–$500 | Slow charge acceptance |
| LiFePO4 | 80–90% | 3,000–6,000 | 25–30 lb | $300–$700 | Smallest array for same usable Wh |
The chemistry choice changes array sizing more than any other decision. A 200 Ah flooded bank gives you 1,200 Wh usable; a 200 Ah LiFePO4 bank gives you 2,300 Wh usable from a lighter, smaller box. That is nearly double the autonomy from the same solar array, which is why lithium has become the default for full-time builds despite the higher upfront cost. Battle Born, Renogy, LiTime, SOK, Dakota Lithium, and Victron all supply LiFePO4 batteries in the 100–400 Ah range that fit under a van bench or in a garage compartment.
One compatibility note: LiFePO4 batteries must not be charged below freezing. If you winter in cold climates, either choose a heated battery or plan to keep the bank above 32 °F. Charging a frozen lithium bank causes permanent plating damage that no warranty covers.
Decision Matrix: Match the Kit to Your Situation
| Your situation | Array | Battery | Controller | Rough system cost |
|---|---|---|---|---|
| Weekend camper, no fridge | 100–200 W suitcase | 100 Ah AGM or portable station | Built-in PWM/MPPT | $300–$700 |
| Weekend camper with 12 V fridge | 200–300 W rigid | 100–150 Ah LiFePO4 | 20–30 A MPPT | $700–$1,300 |
| Full-timer, light loads, sunny region | 400 W | 200–300 Ah LiFePO4 | 30–40 A MPPT | $1,400–$2,600 |
| Full-timer with Starlink and laptop | 600 W | 300–400 Ah LiFePO4 | 50 A MPPT + 30 A DC-DC | $2,400–$4,200 |
| Four-season / northern winter | 800 W | 400–600 Ah heated LiFePO4 | 50–70 A MPPT + 50 A DC-DC | $3,500–$6,000 |
| Induction cooking, no AC | 800–1,000 W | 400–600 Ah LiFePO4 | 60–80 A MPPT + 50 A DC-DC | $4,000–$6,500 |
| 12 V air conditioning | 1,000–1,400 W | 600–800 Ah LiFePO4 | 80–100 A MPPT + 50–60 A DC-DC | $6,000–$11,000 |
| Small van (Transit Connect, Metris) | 200–400 W, high efficiency | 100–200 Ah LiFePO4 | 30 A MPPT | $1,000–$2,200 |
| Renter / lease vehicle, no drilling | 200 W suitcase or flexible with VHB | 100–200 Ah portable station | Built-in | $600–$1,800 |
| Hot climate, fridge works hard | 500–700 W | 300–400 Ah LiFePO4 | 50 A MPPT | $2,200–$3,800 |
Winter and Low-Light Performance
December is the design case for most North American van builds, and it is brutal. At 45°N latitude, flat-mounted panels see roughly 1.5–2.5 peak sun hours per day in December versus 5.5–6.0 in June. A 600 W array that produces 2,520 Wh in June produces 630–1,050 Wh in December. Meanwhile, the diesel heater fan runs longer and the fridge runs less, so the load shifts rather than shrinks.
Three mitigations are worth considering before you buy. First, oversize the array by 30–50% relative to your summer load, because the extra panels cost less than the extra battery you would otherwise need. Second, add a tilt mount on at least one panel — tilting to 45–60° in winter recovers 20–30% of the lost production at northern latitudes, and a manual tilt bracket costs $40–$120 per panel. Third, add alternator charging and plan to drive. A 50 A DC-DC charger recovers more in two hours of winter driving than most roof arrays produce in an entire winter day.
What Wears Out First
| Component | Typical service life | Failure mode | Prevention |
|---|---|---|---|
| Lap sealant at roof penetrations | 3–5 years | Cracking, pull-away from frame | Inspect annually, reapply |
| VHB tape (flexible panels) | 5–10 years | Heat-driven creep and release | Mechanical fasteners as backup |
| MC4 connectors | 8–15 years | Corrosion, loose crimp, water ingress | Proper crimp tool, dielectric grease |
| Cable glands | 5–10 years | UV degradation of the rubber seal | Stainless glands, reseal |
| Charge controller | 8–15 years | Capacitor aging, thermal stress | Mount in ventilated, dry space |
| Panel encapsulant | 10–25 years | Yellowing, backsheet cracking | Buy certified panels, avoid flexing |
| Flexible panel cells | 2–8 years | Microcracks from repeated flexing | Bond to flat substrate, never walk |
| LiFePO4 battery | 8–15 years | Capacity fade, BMS failure | Avoid freezing charge, limit depth |
| Roof fan gasket | 4–8 years | UV cracking, leaks | Annual inspection, silicone grease |
Notice that the panels are rarely the first thing to fail. The sealant, the connectors, and the mounting hardware fail years before the cells do. That is why buying a slightly more expensive mounting kit — stainless fasteners, quality glands, UV-rated cable — pays off more than buying a slightly more efficient panel.